Showing posts with label big picture. Show all posts

Tuesday, January 11, 2011

Hiccups

I spent the last week in bed with my second cold of the season. This second time around, or perhaps the rallying of the first, was much worse, and on the fifth day, this uninsured blogger dipped into her stash of expired antibiotics in the hopes that the dark phlegm forces were at least in part bacterial, and two days after that, energy, if not fully clear sinuses or lungs, returned.

I began work on the house again yesterday, hacking away at little jobs and putting together a more comprehensive plan for the completion of the bathrooms, which is our next project milestone. Having just bounced back from my own personal schedule setback, I worked to draw up a thorough and realistic plan and anticipate as many hiccups as possible. And everywhere I look, I see hiccups.

What does a hiccup look like? I'll show you...

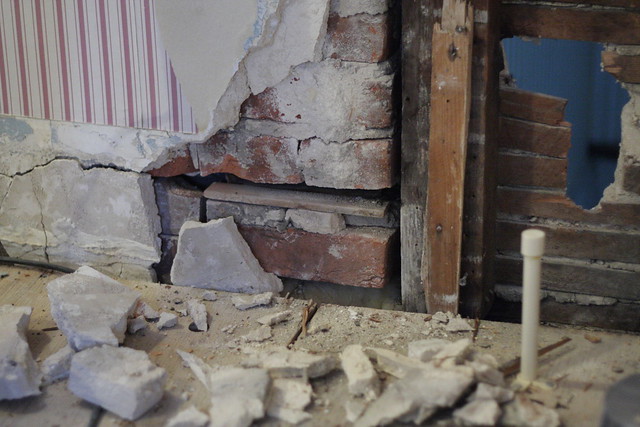
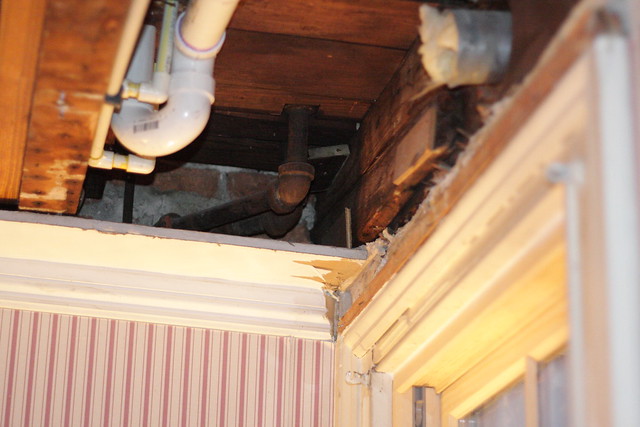
A hiccup looks like a hole in a structural wall, larger than you had previously assumed.


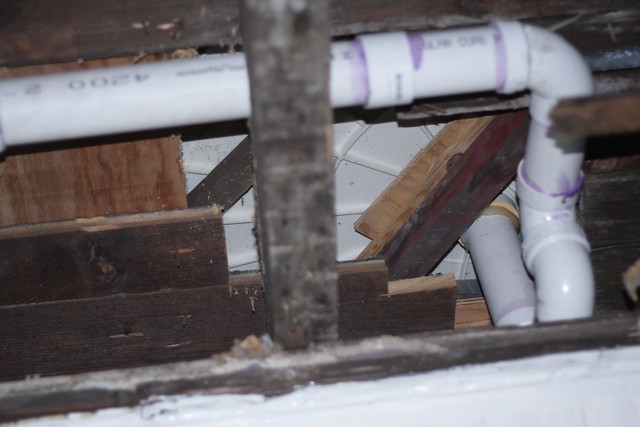
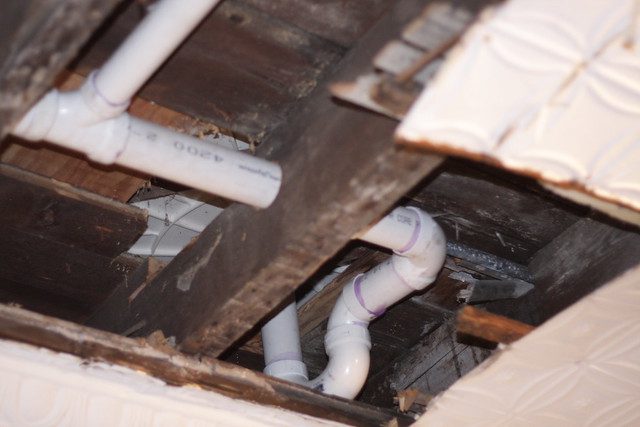
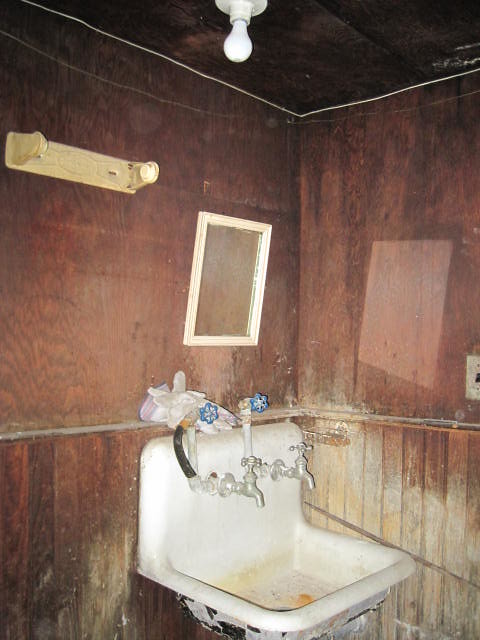
A hiccup looks like a dubiously supported shower pan.


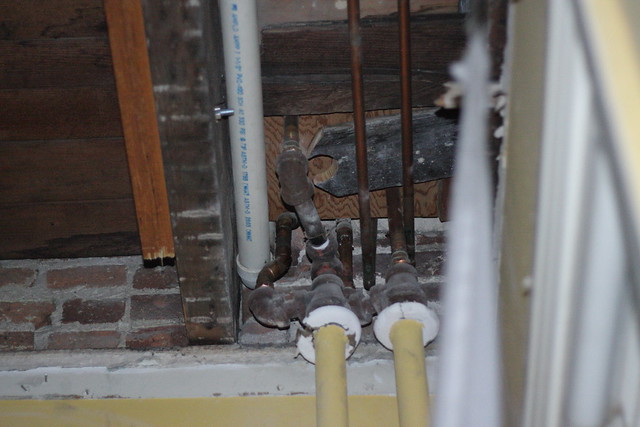
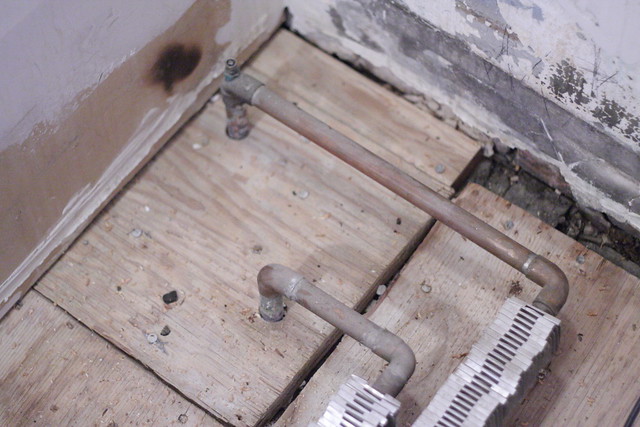
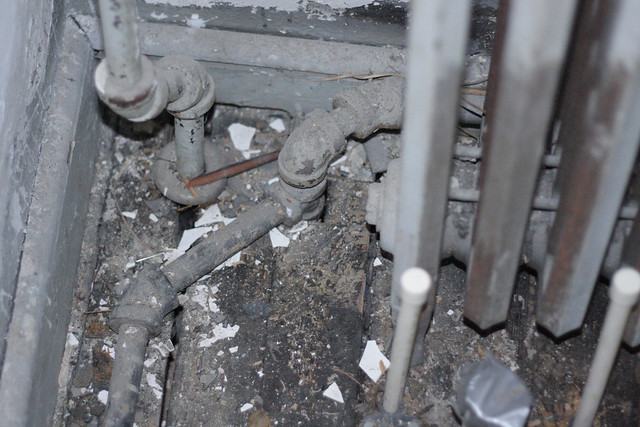
And a hiccup looks like hot water pipes and radiators that we finally have to deal with for real before getting more work done:


Maybe that last one is not so much a hiccup as an as yet avoided inevitable.

I'll write in more detail about each of these three problems and their particulars in soon to follow posts. What to do about the radiators is the first question.

Thanks again to everyone for reading. It's good to be back.

Saturday, January 1, 2011

Decking the Halls, Refinishing the Floors


Happy new year from the third house on the left. In this first post of 2011, we investigate refinishing the floors. Thanks to the bathroom demolition we have a number of spare extra hard wood floor slats. These are about 3/8" thick, 2" wide pieces of wood which form the top layer of our floor. We use one of these extra slats for our refinishing experiment.

The first step is to sand the wood to mechanically remove crud which has impregnated the top surface over the years. For aesthetic reasons one sands with the grain. A belt sander would be the right tool. For this experiment we simply manually sand. We attach a fine grit sand paper to a 2"x4" and sand until a virgin layer of wood is revealed. Another sanding with ultra-fine grit paper finishes the job. Behold the fruit of our labor:


The top piece is a random representative slat from our floor. The bottom specimen has been sanded. Looking good.

The next step is to try out a stain. The Mrs wants a dark stain, so we start with antique walnut. After making sure all the dust from the sanding is removed from the surface, we use a foam brush to paint half the sanded slat. We let this sit and dry overnight and then the next morning apply a second coat. In between each application of stain we lightly sand (with ultrafine paper or steel wool) the surface to smooth over any imperfections in the dry finish that might nucleate a concentration of stain in the next coat. Here is the result:


The stain was not as dark as expected, but that's probably because we're starting with a pretty light wood to begin with.

The final step is apply a protective coat. There are several options. Two popular coatings are wax and polyurethane, the latter providing a tougher finish. We choose the polyurethane. Two coatings of polyurethane (again with light sandings between coats) does the job. And we're done:


The polyurethane really brings out the grain in the unstained wood. The muddled look of the stained side is due to my poor photography: the appearance of the stained wood did not change much. The final finish is smooth to the touch and will prevent the splintering from floor boards to which we've grown accustomed at the third house from the left.

The Mrs wants an even darker finish... espresso maybe, so it's back to the drawing board!

Wednesday, December 29, 2010

Basement Laundry, Part VI: The Plan

Now that I've written a handful of posts detailing some of the parts of the Laundry Room, I figure it might be helpful to zoom out and take a look at the sum of all parts.

For those who haven't read the other posts, and as a reminder to those who have, our laundry room is in the basement of the house, just west of the back stair.


The drawing above is meant to show the as-built conditions of the basement, and it is generally accurate. But some things in the drawing are generalized. For instance, the area labeled "BOILER" is home to more than just a boiler, and the area marked "LAUNDRY" is actually only the location of the dryer.

So, let's zoom in on the laundry area for a more accurate view of how the space was programmed and where the utilties were located, when T&H first bought this house.


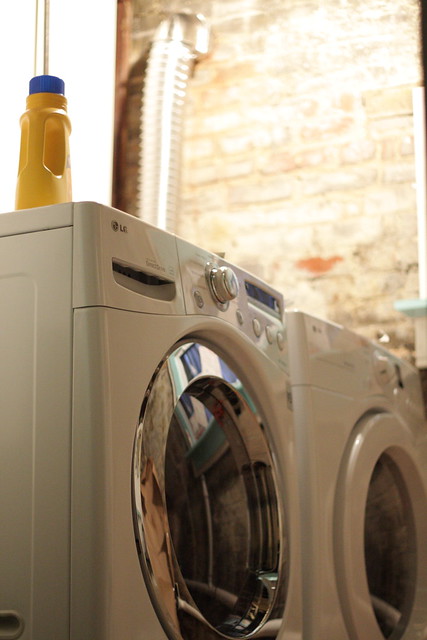
As you can hopefully make out from that lovely photoshopped drawing above, the washing machine was not even inside the laundry room. There is a sink next to the washer, and the washing machine water supply hookups were retrofitted to the sink fixture.

Check out the soap deposits on that wainscoting.
The plan for the new laundry room, in addition to just cleaning and scrubbing and slapping a few coats of paint on the place, is to demolish the shower, move the sink inside the room, move the dryer vent from the window to the wall, replace the window, repair the brick wall (a task with many, many sub-tasks), and install working laundry machines.


One thing to note, the washer and dryer squares in these drawings are purely graphical; they are not to scale. The washer and dryer that were in the house when T&H bought it were undersized and similar to what is drawn here. T&H bought full size machines, and they are a bit tight in the space.

The only tasks we have left in this room are to fix the brick wall, add some trim, finish painting, move the electrical, and install the sink. Even then, this will be a roughly finished room, no bells or whistles or smooth surfaces, so there will always be room for improvement. Like adding a door!


I wish I knew all of the people who have lived in this house. I suppose I could and should look up the public records someday, for curiosity's sake at the very least. But it would be nice to be able to talk to them and learn about the way this house was lived in and the way lives changed and how the house changed with them.

It is pretty evident that this room was not originally designated for laundry machines. But the waste connection for the sink and toilet (and once for the shower) are all encased in the basement's concrete floor. When did the basement get a concrete floor? When was the cast iron sewer line put in?

If the room was built as a bathroom, why the extra space to the west of the doorway? Just a place to change one's clothes? Was this once a tiny, unheated bedroom that was converted to a bathroom when the front waste stack was installed for the house?

My best guess right now is that this was originally built as a bathroom, and it was put in at the same time as the basement floor, some time in the first half of the twentieth century. (I know, I'm really pinpointing it there.) About a third of the nails used in the walls are old-style, unbending, iron nails and the other two-thirds are newer, but I don't know enough about nails to guess at a decade. Yet.

Of course these questions lead to larger questions of when were the different portions of this house built? Was it built in stages? Many people on our block talk about these homes and speculate when different portions of the houses were added on. Right now, I'm not convinced that any part of our house, any part that's still standing anyhow, was an addition. There are no interior brick walls that once marked the end of the house. There aren't, yet discovered, any traces of such walls, either. The foundation walls seem uniform, the symmetry to adjacent homes, intentional.

We will keep digging to find clues to the answers to these questions, and in the meantime, we'll be washing our clothes in the luxury of our own home.

(One of these days I'll get a wider angle lens. Or this baby.)

Thursday, December 23, 2010

Following the Photography

Dear everyone,

I'd like to call your attention to the right hand side of this blog. Down below the landfill counter and the list of followers and the list of blog posts, you'll find Recent Pictures.

I am taking lots of photos of the house as our work progresses, and everyday I upload more photographs to my flickr.com account. In the side bar there, the ten most recent images will be displayed, and if you click on "View All", you will be forwarded to my flickr set of all of the house pictures that I've taken since starting the blog.

I take more pictures than I blog about, so if you're interested in seeing additional carnage, that's the place to go.

Thanks again for reading!


Tuesday, December 14, 2010

We've Been Thinking About Our Doorbell

Or lack thereof.

Last July, in the Maryland summer heat, before T&H had bought their house, when it was just another MLS listing to review, this house had a doorbell. Or, at least, it had a doorbell fixture.


Please note that the front door also had a door knob. Sometime between that July day and the day they became official homeowners, both disappeared. The knob broken off, the bell fixture removed completely.


Before getting into this business of knobs and bells, let's take a moment to check out that handsome knocker.


My favorite thing about this knocker is that people actually use it. And it works just the way it was meant to. Loudly. Of course, the resonance is helped along by the fact that our door has been weathered thin as a reed, and most of the house is an empty echo chamber.

My second favorite thing about this knocker is its bizarro-world resemblance to Pee Wee Herman's trusty, sneak-past-the-butler, automatic knocking device.

Oh yeah?! Where're they hosin' 'im down?!
But back to the front door and the rest of its hardware. After T&H bought the house, one of the first things we chose to do was clear the garage of debris. The space was about, oh, three feet deep with trash and yard clippings and someone's once-cared for belongings, under a roof riddled with leaks. Beneath the surface, the pile had been nearly entirely converted to soil by happy worms and roly polys.

While we destroyed the worms' and roly polys' home, and carted it off, in 4 truckloads, to a city sanitation yard, Toby discovered a door among the debris. This door has a great, only-thing-holding-up-the-garage-roof story to go with it, but I'll save that for another day. Today what we care about is hardware, and this door sure had it, Roanoke style.

As soon as I could, I replaced our beheaded door knob with the Roanoke pattern knob from the door in the garage.


We'll wait until we replace the door to add the matching door plates.


With the door knob problem solved, I really needed a doorbell, because I can't be running through the house and checking the front door everytime I hear some banging. (This is a construction site, after all.) For the time being I have installed a very ugly, very economical, wireless doorbell.


We gotta get this fixed, people!

For a while now, we have been entertaining the thought of installing a Victorian era twist doorbell, in the same pattern as our door knob and plate. However, twist door bells would typically be mounted on the door, exactly where our mail slot goes. The bell itself is mounted on the back side of the door, and the turning fixture is mounted on the front. The two are connected through the door by a spindle, and turning the handle on the front fixture mechanically rings the bell on the other side of the door.

Can't have a doorbell and a mail slot in the same place!

We can't get rid of the mail slot. That's pretty necessary. So H suggested we put the doorbell just above, like so:


Another option is to forget the twist bells, and install a push button bell where the old lion once was. There is a company on ebay that actually makes a Roanoke style, push button doorbell, with a lion as the button. Here it is photoshopped onto our door frame:


They're all starting to look the same to me, but my gut says to leave it on the door frame.

What do you think? Any other ideas or suggestions? Please help us!

Monday, December 13, 2010

The House

As I mentioned in the first post of this blog, our house is a 19th century, three story, brick row house. It is the third house from the left on the east side of a long neighborhood block in an historic district in Baltimore, Maryland.


We are one of a triplet, as are many of the houses on our block. The house to our right and the house to our left shared our identical, though mirrored, original floor plan. A century and a half of changing owners and changing lifestyles has individualized each one. Their facades differ from ours only in the decorative first floor balconies, front gardens, and trim colors. Our trim was once a sort of deep sea green, but it has faded to grey blue.


We are one of the only houses on the block that has retained its original (or, original style, at least) front shutters, though we only have about 60% of them left. Our neighbors tell us the rest fell during Hurricane Floyd in '99. Those that fell seem to have been collected and stored in our garage where they have each lost their bottom few inches of wood to rot.


We have a skinny side yard which opens up to a long backyard that ends with a garage which in turn opens onto an alley.


The plot of land, and thus the row house itself, is 18 feet wide. The north wall steps in, away from the neighbor's house, twice, allowing for sunlight and fresh air to reach the center of the house. Windows in the step-in walls allow for excellent cross-ventilation. It can get down-right windy in there, if you set the windows accordingly.


Now, I've said, repeatedly, that the house is three storys tall, and it is. I didn't lie. But once you climb above the first floor, the front of the house and the back of the house, split by the main stair, are not at the same elevations.

Longitudinal Section Through Center of House

You may have noticed what appear to be doors to nowhere on the back wall of the house at the first and second floors. You are not mistaken.

The bottom door leads to the basement. The one above, to the first floor. Above that, the second.

This house once had porches. Pretty, wooden porches. Deteriorated by weather and neglect, the reportedly structurally treacherous, pretty, wooden porches were removed before T&H bought the house. We are left with their footings, their nailers, and the gaping holes their beams once anchored in. 


Back inside the house, the upper floors house the bedrooms, four of them, and each bedroom has a bathroom.


Our neighbors on the block are interesting, friendly people with many a great story to tell. A handful of these neighbors grew up in the houses they have since inherited and moved back into. One woman who lives across the street with her husband in a gorgeously preserved home, explained to Hyeseung and I how the neighborhood had changed, and not changed, over the last sixty years. One interesting point she made was that, though it may seem to some that the renting out of rooms in these houses is a sign of recent times, it's actually a trend that dates back at least half a century. She recalled not only which families in which houses had converted their homes to include an apartment, but also the tenants themselves: a nurse, a librarian, single working women in the 1950's.

Our house has one such apartment on the third floor, and it's where Toby and Hyeseung are living right now.


I hope this has provided a decent snapshot of the size and layout of the house. Now to get back to work on it! But first, sleep, and then to the Permit Office.

Tuesday, December 7, 2010

Into the Middle of Things

Hello, blogosphere, and, more particularly, friends and family!

Today I begin telling the story of a nineteenth century, three story, brick row house in Baltimore, Maryland. Our house was built, on speculation, in the wake of the Civil War. A hundred and thirty-some years of care, and a few recent years of abandonment and neglect later, my brother and his wife call this place their home. They own it; they are not squatters; however, if you were to walk in the door right this second, you might question that assertion. Right this second, it's more of a construction site than a home.


This is where I come in. Together with the help of my brother, Toby, and his wife, Hyeseung, and various visiting friends and relatives, (and some licensed professionals like contractors, plumbers, roofers, and other excellent people) we are dedicating one year to making this house T&H's home.

Our plan here is pretty simple. T&H both work full-time outside the home, and I work full-time on the home. And then a good chunk of T&H's free-time is spent working on the home, too.


This dedicated year began September, 2010, and it will end with August 2011.

So here we are, smack dab in the middle of things. Much has been done already, and I will do my best to catch everyone up to speed on the basics of the house and the details of the plan in good time. For now, here's the brass tacks:

roof has been replaced:

main water supply line to the house has been replaced:

all interior plumbing supply lines have been replaced:

cast iron waste/vent stacks which ran along the outside of the house have been replaced with PVC stacks that run inside the house:

all interior waste lines have been replaced;

one bathroom has been finished and hooked up to the new plumbing;

sideyard, backyard and garage have been cleared of debris (sideyard shown);

the tree growing out of the garage door has been conquered and uprooted!

And we bought a sweet truck.

Currently, my main focus is The Laundry Room. I'll write all about that starting tomorrow, but for now, I leave you with a before picture:


Lovely, no?

Until tomorrow,

S