Monday, July 21, 2014

Lumberjacks for a day.

Sadly about a year and a half ago the mimosa tree beside the house died. It stood three stories tall, occupying the narrow space between my neighbor's row home and my own. In the spring it would attract hummingbirds with its pink wispy flowers. Since it's demise, the tree has struck a depressing silhouette in nearly all the side windows of the house, a reminder of the many things in life undone. Until last weekend.
The dead mimosa tree
Two of the students who work with me at the lab came over to help fell the tree. We used a pole saw tree trimmer, working from the top down. From the third floor of the house, we lassoed the larger branches of tree. One of us would hold a branch with the rope from a third floor window while the other two sawed it off from a second floor window. Then the branch would be lowered with the rope to avoid clipping the various lines running between the alley and the house below.

After finishing the upper branches, we sawed off the larger lower branches as my neighbor and his guests eyed us nervously from various windows. Finally it was time to take down the main trunk. We had fun with this, using the old axe left in the garage by the previous owner.


Timber! We used a saws-all with pruning blade to make quick work of chopping up the branches and trunk. One more thing done!


Sunday, August 11, 2013

Whack Attack

The largest looming project at the third house from the left is the back yard (including reinstalling the deck etc). Until we begin that major campaign the yard must be defended from the formidable Baltimore weed invasion. Enter the weed whacker. My dad owned a corded whacker, and my memories of that tool suggested that it would handily clear our small backyard jungle. So I made my way to the hardware store and, my lord, I met an intimidating array of whackers from Gasoline powered trimmers to battery powered units with prices as high as $300:


I found my tool at the end of the aisle: a $30 corded unit, which looked like my dad's trimmer, fit the bill. Here is a photo of the whacker assembled at the house, ready to do battle.


I made two passes, with the second in a demolition mode bringing the line down to the ground and tearing out weeds to the root. Here is the before and after:


Sunday, July 21, 2013

Shelves for the Basement

I've have made some progress taming our basement with shelving. Here are some cantilevered shelves that I use to store tools over the work bench.

I also added 30" deep storage shelves on either side of our basement fire place. Here is a before/after of the basement.
         

Where did all the junk go? On to these big shelves, of course
Here is how they were made: 2"x3"s hung from the rafters define the frame and then two shelves with 2"x3" cross-bracing hold the plywood tops.

Finally, I installed shelves inside the fireplace to hold our house paint. Here is a before/after set of pictures. The shelves were recycled from old 2"xWides" that the carpenters used to install the windows.

Saturday, November 12, 2011

Long time no post

Many things have happened since our last posting in February. Sarah Marriage has moved onto the College of the Redwoods Fine Furniture school (http://www.crfinefurniture.com/). Before she left, she completed some very fine work on the bathrooms in the house. Since August, Hyeseung and I have been making progress mainly through work with contractors. Here is an abbreviated list of what has been accomplished in the past couple months
  • Hyeseung's art studio on the top floor has been finished.
  • The ceiling on the living room was replaced with new electrical for chandelier.
  • Tile floor is installed in the kitchen and all walls are patched.
  • One of the kitchen doors to the outside was bricked over and all the walls in the kitchen were patched.
  • A new ceiling was put on the kitchen (after the old one was pulled down).
  • The living room, dining room and kitchen are painted.
  • New appliances (stove, fridge, dishwasher) are purchased.
  • Cabinets were designed and purchased (tbd 4 weeks with countertops arriving 3 weeks later).
  • The holes in the brick work in the back of the house were patched.
Here is a photo showing the brickwork in the back. It looks so much better.

In this picture, you can also see the new glass door that we had added to the kitchen. All the new brick work is in red. We used old bricks from the house to match the existing. These bricks are a century old and much softer than their modern equivalents. For this reason you want to use softer mortar, but I'm sure the contractor didn't do this. Also you can see they go the wrong color on the mortar on the left of the new door (grey instead of tan). C'est la vie (with contractors anyways). They get lots of work done and you can't always expect it to be perfect.

Here is a shot of the living room (blurry, sorry), where you can see the mirror mounted and H's nice choice of blue color for the paint. (The mirror is hung low... ugh.)
Who is that dashing fellow in the reflection? Also here is the kitchen with new floor, door, etc.
The stove is cool. It's a Bertazonni which got pretty good reviews and will be fun to cook with when the kitchen is all set up. The damn stove legs came bent in, but hopefully the rest of the stove works. You can see the glass door in the background that is the same as the glass door in the shot of the bricks (first image in the post). This looks out onto our "back yard" which is basically a construction site right now (with herbs thanks to Sarah). You can also see the radiator that the contractors recently painted black. They did not remove the existing, chipping paint (argh) so this will have to be redone at some point. Lots of other stuff for us to deal with in the mean time. Hopefully post again soon...

Monday, February 28, 2011

Ode to Toilets

We thought we had it all figured out, the toilet purchasing game. The plan was to make the process simple and the bathrooms uniform. A toilet itself is a simple machine. It's all geometry and gravity. But let's not let that prevent us from over-complicating things.

1131 is the number of different styles of toilets available for purchase from Home Depot alone. Lowes carries 693 different units but also sells 407 individual tanks and 534 individual bowls for a seemingly endless selection of combinations (cruelly, the fact that only certain tanks are compatible with only certain bowls just makes the headache worse).

Not in the running.
These numbers can be whittled down quickly once you eliminate all the biscuits and almonds and bones and ivories and mochas and linens and Mexican Sands. All four of the bathrooms in the house will have white toilets, and Home Depot only sells 353 of those.

So the other criteria come into play: price, seat height, seat style, tank style, handedness, flushing options, flushing power, brand reputation.

Flushing power is usually solipsistically defined with unique detail that the consumer has no measure for weighing. The flushing systems are further distinguished by their brand names like Cadet 3, Class 5, Ingenium or ECOPOWER! To make sense of the options, we asked our plumber... which brings us to brand reputation.

Our plumber advised us never to buy American Standard. He recommended Kohler Cimarron, given our price range.

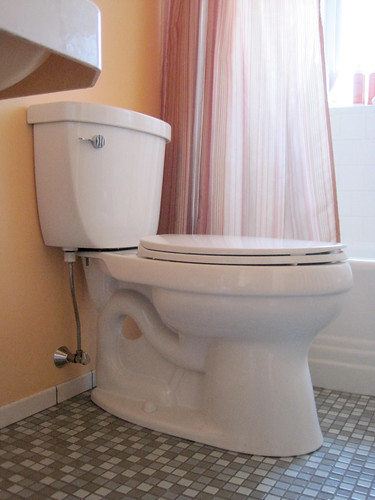
Armed with this advice and a pre-existing preference for the Kohler aesthetic, Hyeseung made quick work of balancing our criteria, and in the end we settled on the Cimarron. This was back in October, a time before the house had any working plumbing. During the first week of November, our contractor finished the floor and walls and ceiling in zone 3B aka "third floor back" aka "the old apartment we decided to finish so that we could move in," and our plumber installed one of the Cimarrons. The bowl leaked. Not the wax ring where the toilet connects to its drain line, not any of the connections; the bowl itself had a pinhole leak. Luckily we had bought two Cimarrons, and our plumber switched them, and we like the working one just fine.


Disregarding the pinhole leak debacle, which had the flavor of fluke anyway, we continued on with intent to purchase the same toilet for the other three bathrooms.

Monday of last week, I awoke energetically with plans to haul a truckload of recyclable materials to the collection center and pick up a Kohler Cimarron at the store while I was out. This next toilet is for zone 2B aka "second floor back" aka "the guest bath" aka "the room I've been focusing most my efforts on in recent weeks."

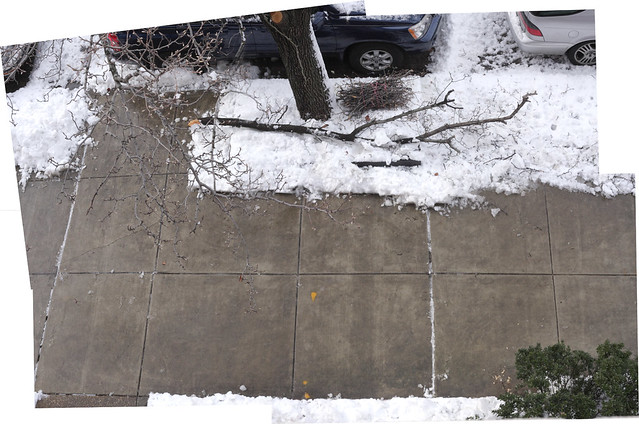
Turns out the collection center is closed on President's Day. And it snowed!
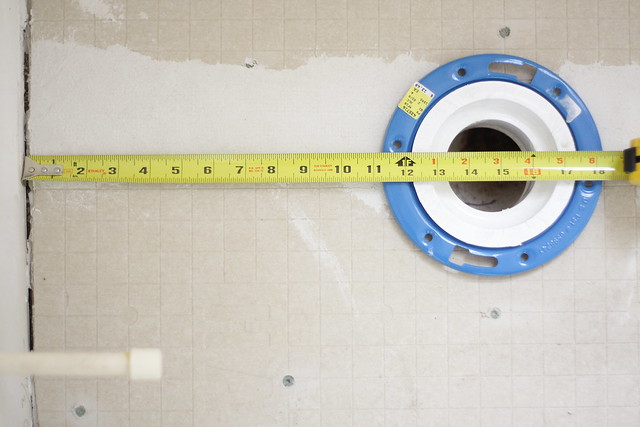
I loaded up the truck with flattened cardboard boxes and No. 6 styrofoam, and then I went up to 3B to measure our first Cimarron and then down to 2B to double-check that it would fit pleasantly in the smaller space. And that's when I realized the toilet drain line in 2B was roughed in at about 15 inches off the wall.


Standard toilet drains for standard residential toilets are spaced 12 inches away the wall, measuring from the centerline of the drain to the face of the wall. Standard toilets are built to fit that standard spacing: the distance between their drain connection and the back of their tanks will be somewhere between 10 and 12 inches. These standard toilets are said to have a "12in rough-in" measurement.

The centerline of the bolt is the centerline of the drain.

If we were to install a standard toilet in 2B, the back of the tank would be somewhere between 3 and 5 inches away from the wall. This is certainly better than being 3-5 inches off in the other direction, but still, we need to special order.

Mass-produced, non-standard toilets come in two sizes: 10in and 14in rough-in. Because our drain pipe is 15in off the wall, we'll need to order the 14in rough-in, and the toilet tank will sit an inch further from the wall than was designed, but it'll do.

We placed an order, last week, for a toilet to fit this space, but that order was cancelled today by the online store, as the item is now out of stock and has been discontinued. With over a thousand toilets to choose from at one big box store alone, we still find ourselves at a loss when searching for a good toilet, with a 14in rough-in, under $300. Anybody got any suggestions? Or positive opinions of American Standard Cadet 3?

In the meantime, we'll keep scouring the internet for more options.

UPDATE: I found the toilet we wanted in stock at a different shop, it is scheduled to arrive Tuesday!

Thursday, January 27, 2011

Casualty of Snow

At the end of the summer, our next door neighbor hired landscapers to trim the pear tree in front of our homes, even though that's technically the city's job. He was concerned, after heavy and damaging snows last winter, that the wistful, long-branched tree might not make it through another season of snow and ice. Dead limbs and those that reached down into traffic or up toward our windows were sacrificed in the best interest of the tree and the neighborhood. Good thing, too, else last night's storm might have resulted in far more damage.


Also, aren't H and I excellent snow clearers / fallen tree branch minimizers?


Wednesday, January 19, 2011

Bathroom Problem the Second: Holes

We have holes and leaks and cracks and permeable membranes all throughout the house. Remember when I wrote that we had decided against painting the Basement Laundry floor, because we needed to wait until we could fix the brick wall in warmer weather? Well, it rained yesterday.

View A
View B
Image Key Plan
Even with our new gutters, which do their job wonderfully, we still get quite a bit of water seeping through the wall. Digging out these walls, repairing the brick, water-sealing, installing drainage, and regrading the earth will be quite the project this spring.

But we are in winter, and we have rooms, above grade, to finish, and the brick walls between these rooms and the great outdoors are not any more immune to weather than their basement counterparts. The health of these particular walls has also been compromised by plumbers of yesteryear, who cut large holes through the brick to run waste pipes from bathroom fixtures to cast iron vertical waste/vent stacks which ran along the exterior of the house.

In October, our plumber removed the cast iron waste stacks and replaced them with a PVC waste and vent system inside the house. We are left with the holes.

Holes in brick wall, filled with insulation, awaiting repair.
Because the waste plumbing was hidden in the sandwich between floor and ceiling below, these holes were busted through right at the sandwich between floor and ceiling below, on the second and third floors. Unfortunately, as anyone who's ever attempted to cut a window into a sand castle knows, unframed holes have a tendency to grow.

Below is an interior view of the hole on the second floor. (The hole is filled with insulation for winter.) The first picture is a view from below the floor; the second picture is a view from above the floor:


You may have noticed one particular complication in the first picture. There's a wood joist involved. Typically, the brick walls in this house are two bricks deep, a pretty standard masonry wall depth. At the location of this hole, however, there is a wood joist embedded in the wall, taking the place of the interior layer of brick. That joist has been cut clean through by this hole.

Structurally, the joist has lived in this condition for decades. The house has settled. But we would like to fill this hole before more bricks begin to fall, and perhaps to bolt a steel plate along the joist to reconnect and reinforce it.


The hole at the third floor is the same exact condition, joist and all. So, we are researching materials for a single solution.

We must have a brick exterior, and we will have a drywall or plaster interior, but what the wall is made of on the inside will be dictated by structural, financial, and geometric constraints.